|
See Also... |
Step by Step Tutorial Tutorial #1 - Adding Applets |
Step 1 of 20
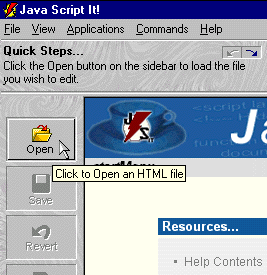
To add an Applet to a document first we must choose the document. Click the Open button on the sidebar.
Previous | Next
 Step 2 of 20
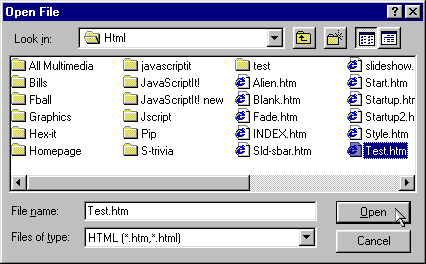
The Open File dialogue box is now displayed. Select the document you want to add an Applet to ('test.htm' will be used for this example) and then click the Open button.
Previous |
Next
 Step 3 of 20
Now that you have opened the document it is time to select which applet (application) to add to it. Locate the Application Explorer on the right side of the screen and click on an application under the Applets node (you will have to expand the Applets node first). For this example we will use the Banner application.
Previous |
Next
 Step 4 of 20
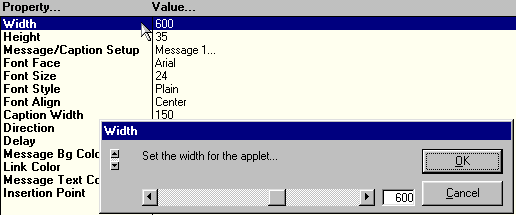
You are ready to start editing values for the applet (for this example we will only alter a few of the values but you may alter as many as you need). Move you cursor over to the Property (or Value) list and double-click on the Width property.
Previous |
Next
 Step 5 of 20
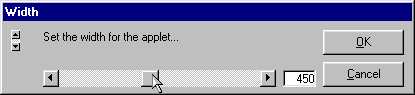
When you double-click on any Property or Value it will bring up an approprate control which will allow you to edit it's value. In this case, lets change the Width to 450 and then click the OK button to apply the change.
Previous |
Next
 Step 6 of 20
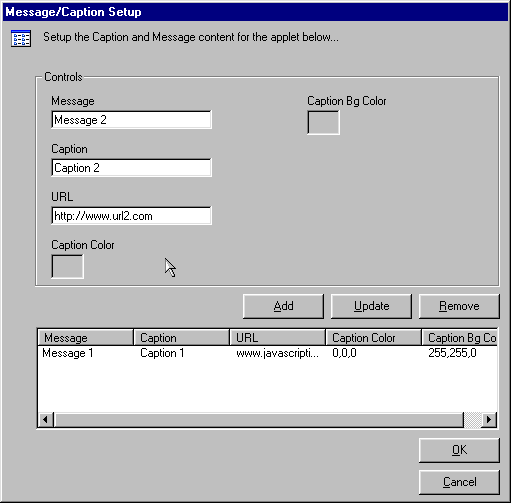
Now double-click on the Message/Caption Setup. The dialogue box below will appear. This is another common control. It groups a bunch of controls together that allow you to create a list values (in this case it allows you to add a multitude of captions that will rotate in the banner). Edit the first 3 fields to display what is shown below.
Previous |
Next
 Step 7 of 20
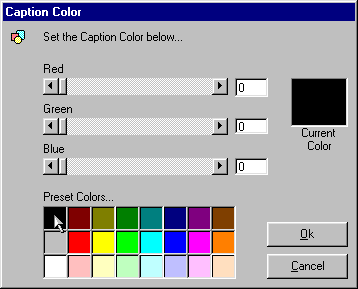
Now double-click on the color box below the Caption Color label. The color picker control appears (another common control). Select the color Black from under the Preset Colors (you can also create your own colors using the sliders above) and then click the OK button to apply the change. Then do the same for the Caption Bg Color this time choosing the cream color (255,255,240).
Previous |
Next
 Step 8 of 20
Now that you have set all values you can add it to the list by clicking the Add button. It will then appear in the list below.
Previous |
Next
 Step 9 of 20
Now click on the first entry in the list (the one that was there by default). Its values will appear in the controls above.
Previous |
Next
 Step 10 of 20
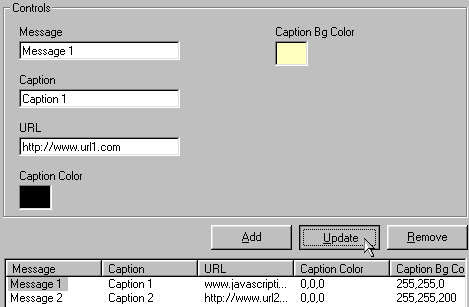
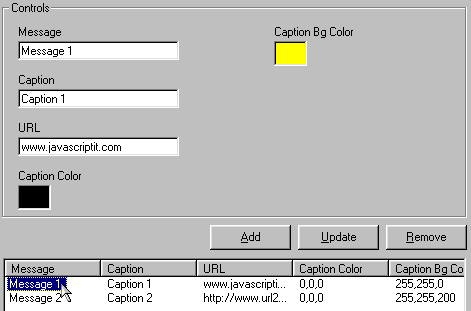
Change the values of the controls above to match what is shown below. Now click on the Update button to update the values of the first entry. Click the OK button to apply the changes.
Previous |
Next
 Step 11 of 20
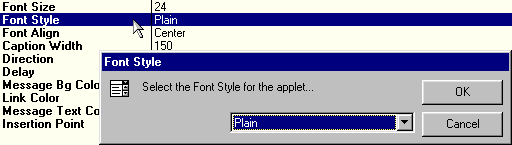
Now double-click on the Font Size property ot bring up the control shown below.
Previous |
Next
 Step 12 of 20
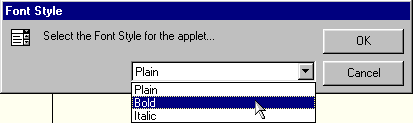
Then select the Bold value from the drop down box followed by clicking the OK button to apply the change.
Previous |
Next
 Step 13 of 20
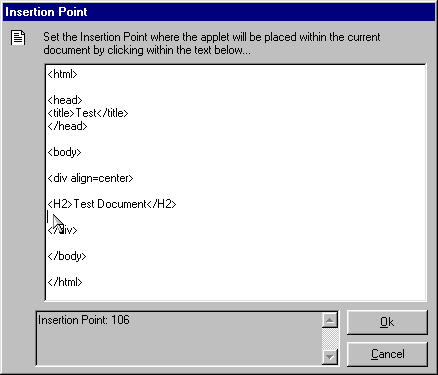
Now it is time to place the applet in the document. Double-click on the Insertion Point property. Place your cursor whithin the document code where you want the applet to appear (we will place it under the heading text for this example). Click the OK button to apply the position.
Previous |
Next
 Step 14 of 20
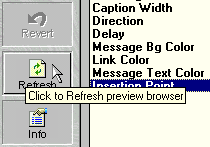
Now that we have changed some values let us view the Banner applet in the current document. Click the Refresh button on the sidebar.
Previous |
Next
 Step 15 of 20
Notice in the Browser Preview Window at the bottom of the screen that the applet is now present and displaying the values that we set.
Previous |
Next
 Step 16 of 20
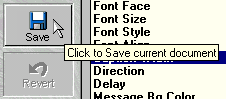
Lets assume that at the moment we are satisfied. Currently the applet has been added to a temporary file (which is also being displayed) but since we like what we have done click the Save button on the sidebar to apply the applet to the actual document.
Previous |
Next
 Step 17 of 20
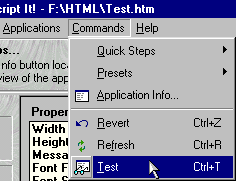
We should also test the current document in another browser to see how it really shapes up. Under the Commands menu click the Test menu item. The browser specified in your Preferences will launch with the current document displayed.
Previous |
Next
 Step 18 of 20
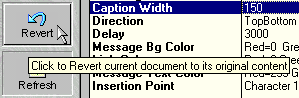
If satisfied we could now close the document or move on to another application and the applet would remain there. Lets assume we have become unsatisfied with the applet in the current document and wish to return the document back to how it was when we brought it into Java Script It!. To do so click on the Revert button located on the sidebar.
Previous |
Next
 Step 19 of 20
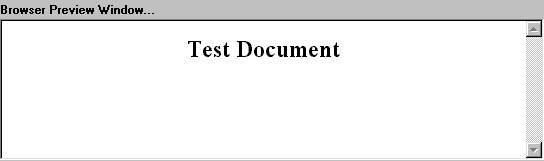
Notice that the applet has been removed and the document is back to it's original state (see the Browser Preview Window). When you use Revert it automatically saves the real document back to it's original state as well as the temoporary file used for display.
Previous |
Next
 Step 20 of 20
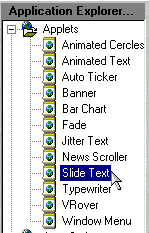
To illustrate a new feature in Java Script It! rather than closing the document lets choose another Applet from the Application Explorer. After clicking on Slide Text we could alter it's values and apply it to the current document the way we did with the Banner applet. Also, please note that we could change applications even if we didn't revert. Once you are done with a document you could open a new document up by clicking the Open button, return to the Start Menu by clicking the Close button or just exit the program.
Previous |
Next